Monday, August 25, 2008

UL-Approved Parts for You


It would be unusual to run across an electrical component that isn’t UL (Underwriters Laboratories) approved, but always check for this tag or stamp of approval on anything you buy, whether it’s a flashlight, power tool, or electrical device. A UL listing is your assurance that the product has been tested for safety. Receptacles, light switches, light fixtures, and appliances all should have UL approval. Keep in mind that UL approval doesn’t imply longevity or ease of installation. A cheaper, lower-end product will never be the equivalent of a more expensive product.

Rent or Buy the ElectricianTools?


Tools might come with some of the same specifications, but one ½-inch drill isn’t necessarily the same as the next. One of the main differences is the size of the motor. Professional, heavy-duty models have large motors and can reduce your drilling time through wood and masonry. Hand tools have their differences as well, usually in the quality of the metal components and the sharpness of the cutting edges. Price is a good determinant here, and you really do get what you pay for. That’s why those 99¢ screwdrivers lose their square edge quickly.

If your framework is exposed and you’re ready to do a lot of drilling at once, you might be better off renting a drill with a large motor. An electrician will use a heavyduty drill regularly and can justify the expense of owning one. The larger the motor, the weightier the drill, so these tools aren’t appropriate for all drilling jobs unless you’re on steroids. As a cost comparison, a Makita 7.5 amp, ½-inch angle drill (a large right-angle drill) runs about $290. Local rental prices vary, but I’d be surprised if it cost more than $20 or so a day to rent one of these. A right-angle drill is convenient for drilling in tight spaces.

Before you rent a tool, handle it and get a feel for it. A heavy tool can be uncomfortable to hold for an extended period of time. You might be better off with a smaller drill that you can handle more safely. When I had nothing else available, I drilled through old, hardened floor joist with a 3/8-inch drill without the sharpest of drill bits, and I still got the job done (not that I recommend this approach—it took time).

Understanding Drill Bits


Drill bits come in every shape and size for all types of jobs, from drilling through masonry to fine craftwork. The most common bits most of us have seen are twist bits that are sold both individually and in sets based on gradation. Twist bits are fine for small holes, but they’re not much use in electrical work except for running small, low-voltage wires.
Electricians run more than one cable through a hole whenever possible, and larger holes (one inch in diameter) are drilled with another type of drill bit. The following are the most common bits for drilling larger holes:
➤ A spade bit
➤ An auger bit
➤ A power bore bit
When running a single cable through a wall stud or joist, a 5/8-inch hole usually is drilled.

Care and Feeding of Power Tools


Power tools are great timesavers and are more fun to use than hand tools. These tools won’t be fun for long, however, if they’re misused and abused. Be sure to avoid the following:
  • Lifting the tool by pulling on the power cord instead of the handle or body of the tool
  • Dropping the tool, especially from the second floor to the first
  • Applying too much pressure while using the tool and ignoring warning signs such as the blade or drill bit slowing down and straining or the motor giving off a burning smell
  • Ignoring damaged cords
  • Leaving the tool out in the rain
Tools don’t ask for much. They’re like huskies and dogsleds. If you treat huskies well and keep them fed, they’ll pull your sled until they drop. A power tool will keep going and going if you take care of it. I’ve run across homeowners with 40-year-old electric drills that still run like the day they came out of the box.
Taking care of your tools also will protect you. A frayed cord can lead to an electrical short, which is not good for your health. A dull blade or drill bit can cause the tool to slip and cut you instead of the wood you’re aiming at.


Power Tools for Amateur


During the dawn of electrification at the end of the nineteenth century, electric tools had yet to be invented. Knob-and-tube wiring passed through wall plates (the horizontal 24s at the bottom of a wall) but ran along the surface of the wall studs, so electricians had little drilling to do. These days, it all passes through studs, plates, and joist, and no one in their right mind would hand-drill the necessary holes. The electric drill is probably the most ubiquitous power tool around. Drills are manufactured according to chuck size. The chuck holds the drill bit or another attachment such as a grinding wheel or a buffer pad. The larger the chuck, the bigger the drill motor (because more power is required to drive larger drill bits and attachments).

A manufacturer’s usual line of drills includes ¼-inch, 3/8-inch, and ½-inch models. Drills come in both corded and cordless models. A cordless model runs on a rechargeable battery. Cordless tools are really convenient. The drawback, of course, is battery life. The tougher the task, such as drilling through wood joist, the more demand on the battery and the shorter its work life before needing a charge. A high-end model such as a Makita ½-inch, 18-volt cordless will hold up longer under more demanding drilling, but it isn’t cheap (around $245). For repetitive, serious drilling, a corded model often is the best choice.
A cordless drill usually costs more than a corded model of equal size. Sales and closeouts can narrow the gap. Power is the key here, so stick to at least a 12-volt model. Also compare charging times for the batteries (the shorter the better).

A decent ½-inch drill will get you through most electrical drilling chores and just about any other job around the house. It will last for years and years doing occasional residential work without breaking your remodeling budget. Prices for an acceptable
½-inch electric drill start at around $70 and up. You’ll find a few other power tools and accessories to be useful as well including …
  • A reciprocating saw for sawing large holes in walls and ceilings.
  • A circular saw for framing work.
  • 12/2 extension cords.
Extension cords are manufactured according to wire gauge, just like electrical cable. A 12/2 cord is made from 12-gauge wire and contains hot, neutral, and grounding conductors.

Sunday, August 10, 2008

Hand Tools List for Electrician

You’ll already be familiar with some of these tools; others are limited to the electrical trade. These tools will cut, strip, and twist wires and will secure electrical boxes, light fixtures, switches, and receptacles. You could strip away insulation with a pocketknife and cut wire by bending it back and forth until it breaks, but you’ll end up with sloppy results and damaged cable. Good cutting and stripping tools prevent wires and insulation from getting nicked and enable you to work with wire in tight areas such as small boxes. The following tables list the basic hand tools for electrical work and some more specialized tools, too.
• Claw hammer for Securing boxes to studs and joist
• Long-nose pliers for Bending wires
• Lineman’s pliers for Pulling wires and cutting
• Diagonal pliers for Cutting in tight spaces
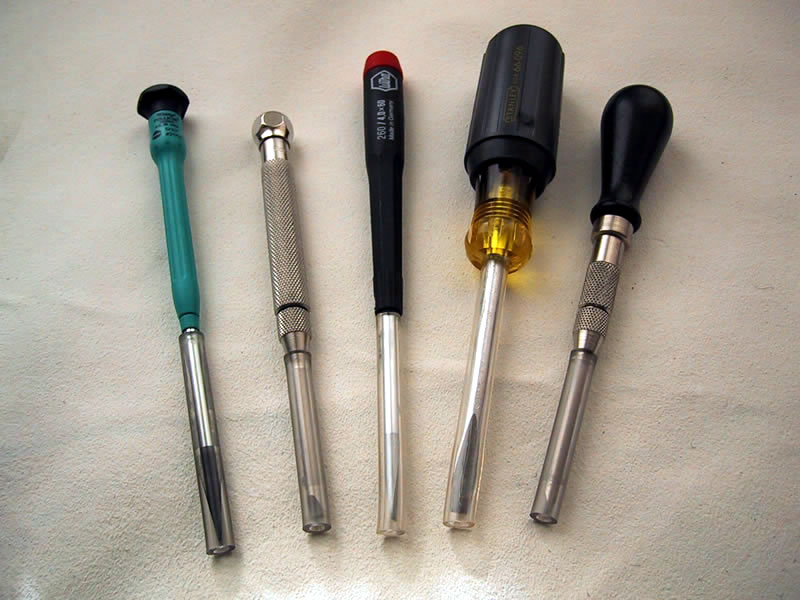
• Slotted screwdriver for Securing switches and receptacles
• Phillips screwdriver for Securing switches and receptacles
• 25-inch measuring tape for Setting box heights and so on
• Keyhole saw for Cutting through walls and ceilings
• Hacksaw for Cutting flexible, armored cable
• Wire stripper for Stripping wire insulation
• Cable stripper for Stripping cable insulation
• Flashlight for Working in dark spaces
• Ladders for Accessing overhead work
• Voltage tester for Testing for current
• Receptacle analyzer for Testing for electrical faults
• Continuity tester for Testing for interruptions in the path of a current
• Fish tape for Pulling wires through enclosed areas
• Conduit bender for Bending metal conduit around corners
• Level for Ensuring that equipment is installed straight and true
• Masonry chisels for Working on exterior installations
• Adjustable wrench for Tightening rigid conduit connectors

Tools of the Trade of Electrician


Neanderthals first used stone tools around 70,000 B.C.E., and life has never been the same since. What started out with a guy named Og making a few simple carving and cutting implements has grown into a multibillion-dollar manufacturing behemoth. From fine Japanese woodworking saws to portable cement mixers, there isn’t a single tool we cannot buy or rent. If you walk into any Home Depot or other large home-improvement chain store, you’ll find an absolute cornucopia of both hand and power tools. Every remodeler needs some of both. The notion that the builders of yesteryear felt greater personal accomplishment because they did everything by hand is an absolute myth. Workers in the trades grabbed just about every labor-saving power tool they could as they were invented.

You don’t need the very best tools. Some professionals even shy away from top-of-the-line products because they have more opportunities to damage them on a job site or to lose them, sometimes through theft, as they move around to different locations. On some very large jobs, contractor bids might include the price of new tools. Ironically, a homeowner, who will use tools far less often than a professional, probably would get more use out of expensive, top-quality tools.
Electrical work calls for some specialized tools as well as some multiple-purpose power tools.

Insurance Issues in Electricity Matters


If safety and legality aren’t compelling enough reasons for you to follow your local electrical code and have your work inspected, a chat with your insurance agent might be more convincing. Any damage to your house as the result of faulty, uninspected electrical work (no matter whether it’s done by you or an electrician) probably will not be covered by your insurance company (read your policy carefully). This can range from something relatively simple such as cleaning up after smoke damage to losing your entire home in a fire.
Let this sink in for a moment. You could lose a $200,000 house if a kitchen circuit isn’t installed properly, becomes overloaded, and starts a fire in your walls—all due to the lack of a permit and inspection. Why take the chance? Some electricians might tell you not to bother with a permit for some jobs, but you have to wonder why a contractor would put his business reputation or even license on the line like that. Gambling is more fun in Las Vegas. At least you can get a cheap steak dinner and 24-hour lounge acts out of it.

Keeping the Inspector in Mind


An electrician has some built-in advantages when dealing with an electrical inspector. He or she can speak knowledgeably about code issues and can justify the manner in which the work is being carried out if there are any questions or objections. It’s assumed that an electrician will be basically competent. As a do-it-yourselfer, your work should be neater, cleaner, and on the conservative side. You don’t want to be pushing the electrical-code creativity envelope.

When You Need an Electrician Permit?


I’m not going to pretend that a permit is taken out for every electrical job, even if the local building regulations call for it. It’s tough to justify the time and expense to obtain a permit when you’re only adding a single receptacle to a circuit that can easily support the addition. Nevertheless, I would be remiss as an author if I ever advocated anything less than playing by the rules, especially given the possibility of harm and damage from wayward electrical work. As a case in point, our own electrician recently was telling me about some receptacles added in a residence—by another electrician—without a permit, and none of them were grounded correctly.
You need a permit any time you alter the existing system. This includes …
  • Adding additional receptacles or fixtures.
  • Adding new circuits.
  • Installing a new service or a subpanel.
You usually do not need permits for repairs or updates that do not extend the existing system. This includes …
  • Replacing existing lights with new fixtures.
  • Replacing broken switches or receptacles.
  • Replacing defective circuit breakers.
Always consult your local code to confirm whether you need to take out a permit before you do your work.

Minimum Damage, Minimum Repairs


Hole saws and other tools of the trade do more than make pretty holes for your electrical work. They also keep damage and subsequent repairs to a minimum. This is especially true when you’re cutting through plaster and lath. Lath is the wood or metal backing that acts as a form for wet plaster. The plaster is forced into the lath where it eventually dries into a wall or ceiling. It’s almost impossible to cut a clean hole through lath using hand tools. A hole saw or a reciprocating saw will do the job quickly and cleanly.

Believe me, you’ll never catch an electrician using hand tools when a power tool is the better choice. You might think you have limited use for a hole saw, and you might not want to spend the money on one, but there’s another way to look at it. A four-inch hole saw costs around $20. If you have to install five light fixtures, the hole saw is costing you $4 a light. It’s also greatly reducing your labor time, and you can avoid the frustration of trying to cut a clean circle with hand tools. Besides, you can always find a future use for it, especially if you have more remodeling projects in mind.