Tuesday, May 31, 2011

Disposers


Disposers are another kitchen toy few of us live without in newer homes. They’re now installed in houses of all price levels. Oddly, they were not legal in New York City until August 1997, when concerns that zillions of pounds of ground-up orange peels, unfinished blintzes, and coffee grounds would clog the city’s plumbing gave way to consumer demand, a desire to decrease waste in landfills, and health hazards associated with uncollected trash bags full of food waste. Local laws in New York say that disposers can be installed only by licensed plumbers and electricians, who need permits to do the work. New Yorkers can contact the Department of Buildings at 60 Hudson Street to get the application for permits.
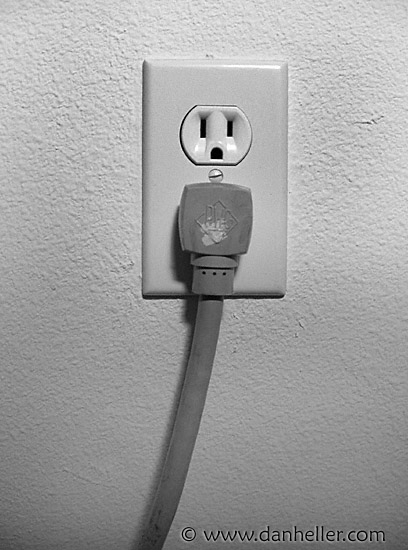
Disposers either are hard wired or are plugged into a receptacle under the sink with an appliance cord and plug. Some local codes require that a disposer be plug connected. A plug-in model is easier to work on because you can disconnect it from its power source quickly for servicing or replacement. This receptacle cannot be used for any other load, nor can it be part of a small-appliance circuit.
A disposer can have one of the following three types of “On/Off” switches:
  • A standard single-pole switch located above the counter or under the sink.
  • An integral switch built into the drain lid that, when twisted, activates the unit.
  • A flow switch installed in the cold-water line and activated when the drain lid is twisted.
With this type of switch, the disposer will not run until cold water is flowing into it. (This helps prevent grease buildup.) Disposers are even available for septic systems. In-Sinkerator makes a complete line of disposers. You can see the company’s products at www.insinkerator.com.

Wiring the Fridge


Some modern refrigerators draw a surprisingly small amount of current for all the work they do. Although the NEC figures 1,200 watts in its load calculations for a refrigerator, some only require half that amount. It’s apparent that it takes more electricity to produce heat than to maintain cold. The code allows a refrigerator to be supplied by its own 15- or 20-amp circuit, but it does not require a dedicated circuit. You can run a refrigerator off one of your small-appliance circuits, but many electricians recommend a dedicated circuit for the fridge.
Why? Remember, your small-appliance circuits are GFCI-protected. All it takes is one instance of nuisance tripping, and your refrigerator could be off for hours (or weeks, if you’re out of town). In addition to losing a lot of food, you’ll have to clean out some pretty rank stuff. A Sub Zero brand refrigerator (or other high-end refrigerator) requires a dedicated 15-amp circuit.

Small-Appliance Circuits and GFCIs


I already mentioned the danger of electricity around water and water pipes. An errant current will not hesitate to pass through you on its way to the ground through a water pipe. You also can get a shock or become electrocuted if you have contact with a receptacle and a range, a refrigerator, or a cooktop because they also are grounded. The code recognizes these dangers and steps in with GFCI requirements. Specifically, the code requires that all small-appliance circuits used on countertops be GFCI protected. This includes any receptacles serving kitchen islands. The usual installation calls for the first receptacle on the circuit (the feedthrough receptacle) to be a GFCI type, which in turn protects the additional receptacles down the line. It also is acceptable to install a GFCI circuit breaker, although this is more expensive than a GFCI receptacle.
The key word here is “countertop.” Other receptacles, such as one for the refrigerator or under the sink for a plug-in disposer, do not have to be GFCI protected. The underthe-sink receptacle cannot even be part of a small-appliance circuit; it must be its own dedicated circuit. Small-appliance receptacles must be installed so that any point on the back of the countertop is within 24 inches of a receptacle. Another way of saying this is that no two receptacles can be more than four feet apart. Every counter that’s wider than 12 inches must have at least one receptacle.

Saturday, April 30, 2011

Dedicated Circuits Everywhere


A kitchen is the home of the dedicated circuit. There are so many high-wattage devices here that too many on one circuit could cause it to trip; therefore, the code says these devices should be split up. Specifically, a kitchen should have individual dedicated circuits for the following loads:
  • All built-in appliances including the dishwasher, range, microwave oven, trash compactor, and disposer
  • Small, countertop appliances (food processors, toasters, and so on)
  • Lighting fixtures (cannot be part of the preceding circuits)
A minimum of two 20-amp small-appliance circuits must be installed to bring a kitchen up to code. These same circuits can supply power to receptacles in adjoining rooms including the breakfast nook and the dining room, but that’s as far as they can go. You can’t run your bedroom clock radio off a kitchen circuit. Beyond the minimum, which is all the code addresses, you or your electrician must consider how your kitchen will be used. An espresso machine, for example, needs its own dedicated circuit if it runs at 1,200 or 1,500 watts to avoid tripping the breaker every time the espresso machine is running and you decide to use the toaster. You would still be legal with your two small appliance circuits; you just wouldn’t be practical given your intended use of the kitchen. If you have a lot of small appliances and use them regularly, consider adding a third or even a fourth dedicated circuit.

Kitchen Wiring

If you’ve ever lived with an outdated kitchen, you’ll appreciate a modern one. Microwave ovens, food processors, and home-model espresso makers didn’t exist in the 1920s and 1930s. One or two receptacles were plenty for the portable appliances available at the time. Trying to make do with your parents’ or grandparents’ wiring at the end of this century is an exercise in frustration, not nostalgia. As you plan your kitchen upgrade, keep in mind any future remodeling. You might not be ready to replace cabinets, move walls, or upgrade appliances now, but you might in a few years. There’s no point in going all out with your electrical changes if you have to redo them later. By all means, add the necessary receptacles, but think twice before adding those fancy light fixtures. All it takes is a different cabinet configuration or the addition of an island to throw your lighting pattern askew. What if you move your electric range or refrigerator? If you run new circuits for them now in their present locations, you’ll have to run them again later. Stick with the necessary work for your safety and convenience now. Of course, if you don’t plan to do any extensive future kitchen remodeling, go ahead with a full electrical makeover now.

Kitchen and Electricity


We take our kitchens very seriously. In years past, a kitchen was hidden away and was seen as a more utilitarian room used simply for the storage and preparation of food. These days, we dine, mingle, read the paper, and socialize in this room, which often has a family room directly connected to it. It’s one of our home’s biggest overall energy consumers, and it demands a lot of wiring, devices, and appliances. Given the multitude of tasks and uses of a kitchen as well as the code requirements, you need to pay special attention to its circuits and the placement of light fixtures and receptacles. As previously discussed, you’ll want plenty of task and ambient lighting. You’ll also need a number of dedicated circuits for individual appliances. On top of that, some receptacles require GFCI protection and some do not. A well-designed kitchen is a joy to be in and inevitably will become the hub of your house. Virginia Woolf said, “One cannot think well, love well, sleep well, if one has not dined well.” I certainly won’t claim that meeting the National Electrical Code in your kitchen will improve all these areas of your life, especially if you live mainly on microwaved hamburgers, but at least you’ll get a better look at what you’re eating.

Thursday, March 31, 2011

Keeping the Inspections in Mind


An inspector will scrutinize your work more closely than an electrician’s work. Make sure your cable is pulled tightly through wall and floor spaces and is stapled according to code requirements, which specify insulated staples or straps …

➤ Not more than 12 inches from a box or fitting.
➤ Not more than 41⁄2 feet from each other when a cable is running along a stud or joist.
➤ Installed without damaging or denting the cable in any way.

You must have at least six inches of cable or conductors in each box from the point of entry into the box. Once attached to a device, the conductors should be neatly tucked inside with the hot and neutral conductors separated from each other. Overall neatness and professionalism go a long way toward satisfying an electrical inspector.

Plenty of Dedicated Circuits


You might have already updated your kitchen and bathroom wiring with 20-amp, GFCI-protected circuits (or opted for GFCI receptacles). Now you can
expand and add other necessary dedicated circuits including …
➤ An outdoor GFCI or two.
➤ A workroom circuit.
➤ A garage circuit.

15 Amps or 20?


Most branch circuits for lighting will be 15 amps. Twenty-amp circuits normally are reserved for dedicated purposes. It’s perfectly acceptable to use a 20-amp circuit for lighting, but use it judiciously because it can handle, for example, four more 100-watt fixtures than a 15-amp circuit. Great, you say, that means less wiring to do—at least until the lights go out. Then it might not be so great. You’ll have that much less light to see by if an entire section of your house goes dark. Twenty-amp lighting circuits work well when you have a large cluster of lights such as in a kitchen/ hallway combination where you might have as many as 10 150-watt recessed fixtures. You also should consider a 20-amp circuit for your home office computer and peripherals. Check the rating of your copier, which could need its own circuit.

Monday, February 28, 2011

Power Everywhere


The whole point of a modern electrical system, aside from safety, is to have power, fixtures, and devices where you want them. You’re only reading this chapter if you have an outdated system or if you’re building your own home or addition. Newer houses rarely need circuits added unless they are being physically expanded or you’re adding more power to an area such as an unfinished basement, a garage, or outdoors. Don’t underestimate your needs. If you’ve got the time, install all the receptacles a circuit can handle. You’re already tearing up the walls, why find out later that the one wall on which you didn’t install a device was where you could really use one? Use the current code as a guide whenever practical for lighting and receptacle requirements. The only time you must follow it is during a major remodel when all the walls are open in an existing room and you’re running new wiring or when you’re adding on.

Write Up a Plan


It’s always a great temptation, at least if you’re a guy, to dive into a project and improvise as you go. That’s okay for standup comedy (at least when it works), but why add to your electrical labors when you don’t need to? A pad of paper and a pen or pencil are still useful tools (even in the computer age) for visualizing your wiring. They can make the job easier and can save you some time by pointing out shortcuts and problems ahead of time. You might discover, for example, that a switch-controlled receptacle will provide light in a dormer bedroom more easily than trying to install a ceiling light. You also might need a plan to get a permit, although not every building department requires one for electrical work. A plan will give you an accurate count of fixtures, devices, circuit breakers, and electrical boxes needed for the job as well as an approximate measure of needed cable. You don’t want to go running back to a supplier because you’re short two receptacles.

Adding New Circuits

In some respects, doing a major rewiring job is easier than doing intermittent alterations. For one thing, you don’t have to mess with tying into much of your old wiring because you’ll be replacing it. Instead of updating the critical areas such as the kitchen and bathroom and just living with the inherent remaining limitations of the old system, you’ll have upgrades everywhere. In other words, you’ll be up to code (or mostly up to code) and be done with it.
Once your new service panel is installed (a job for an electrician), adding circuits is something most homeowners can do themselves. Even if you simply plan out and install the cable, you’ll be saving a big part of an electrician’s fees. Getting cable from the service panel to the device is the time-consuming part of the job. If nothing else, in a culture where we are increasingly disassociated from physical work, wiring your house can be a source of great pride and accomplishment. As with any alteration to your electrical system, you must have permits and pass an inspection. Some business consultants believe that a messy desk is the sign of an inspired, creative mind, but this isn’t so with wiring. Freudian analysts might have a field day with electrical inspectors’ obsession with neatness, but that’s what they want to see, so don’t disappoint them. Finally, plan your time. You don’t have to do the entire house at once. You can do some of the work alone, but some is best done with two people involved. Check your calendars and pencil in—or punch into your personal digital assistant—a day that works for two of you.

Monday, January 31, 2011

What’s This Going to Cost?


According to Today’s Homeowner magazine, the national average cost for upgrading an electrical service to a three-wire, grounded, 200-amp service is $2,264. For a little over $2,000, you get a safe, updated system and maybe a break on your insurance. If an electrician does the job, it will be done quickly and will be up to code. The electrician is responsible for meeting the code requirements. You’ll have some clout because you won’t (or shouldn’t) be paying the final bill until the system has been inspected and passed by your local building department.
This chapter pointed out at least the major steps and considerations you’ll face when upgrading your electrical service. This is well worth contracting out to an electrician, and I recommend that you do so, even if your local code allows you to install it yourself.

Subpanel Considerations


The most logical locations for a subpanel in a remodeled house include …
➤ In a new addition.
➤ In a garage workshop.
➤ Near an attic converted to finished space.
A small subpanel can hold as few as two single-pole breakers, and a large one can hold up to 42. If the appearance of a larger panel isn’t an issue for you, go ahead and install the larger panel so you’ll have it available for future use.

Subpanel Alternatives


Before installing a subpanel, consider its necessity. Certainly, it’s a convenience in the event of a tripped breaker, but is it worth the expense of purchasing a second panel (albeit a smaller one than your main panel)? The convenience factor aside, what you’re really comparing is the difference in cost between running individual circuits all the way back to the main panel and running a feeder cable to the subpanel, the cost and installation of the subpanel, and the cost of running the branch circuits from the subpanel. Some subpanels are installed because there aren’t any breaker slots remaining in the service panel, even though the panel has the amperage to carry more circuits. In this case, your existing breakers can be replaced with a smaller version of a standard single-pole breaker. These go by different names, including …
➤ Slimline breaker.
➤ Peanut breaker.
➤ Mini breaker.
➤ Tandem breaker.
These breakers are half the thickness of a standard breaker, which enables you to fit two of them into a single breaker slot. Others have two breakers on one single-polesize breaker.